You have an AirPod. You also have a MacBook. Now you’re ready for them to work together – but you’re not sure how to set them up. You can set them up yourself without the help of anybody if you can follow the step-by-step guide in this article.
The good news is that the AirPods have a fairly intuitive connection process, but you’ll still need to know where to go and what buttons to press. Our guide will help you connect your AirPods to your MacBook in just a couple of minutes.
For AirPods paired with your iPhone, that’s really easier and simple to connect within 2minutes.
Are you trying to pair AirPods with your Mac that has already been paired with your iPhone? This is possible: in fact, it is much easier than trying to connect a new pair of AirPods. The key is that your iPhone needs to be connected to the same iCloud account as your MacBook, with the same Apple ID. For most people, this won’t be a problem, but if your iPhone is used by multiple people or you need a different account for your Mac work, here are the steps to follow so as to successfully connect your AirPods to your MacBook:
STEP 1: Place your AirPods in your ears, make sure it is turned on, and then turn on your MacBook.
STEP 2: When your Mac loads and you can access Mac Operating System (OS). Open the Preferences of the system from the Apple menu or the Dock to, where you can see all the active connections and settings for your MacOS. One of them will be the Bluetooth settings, which is indicated by a small Bluetooth signal (usually found by the Wi-Fi signal.
STEP 3: Once in the Bluetooth region, Select/Click it to turn on. Check to the left to make sure it is on. It probably is, but confirmation is required and important.
STEP 4: Confirm again by picking up your AirPod case, open the cover for better connectivity, and turn it around so you can see the back of the case. There is a button on the bottom center of the case that is used for settings.
This basically turns on Bluetooth so it can be detected by nearby devices, in the case of recognized by your MacBook. Press and hold this settings button until the status light next to it flashes white.
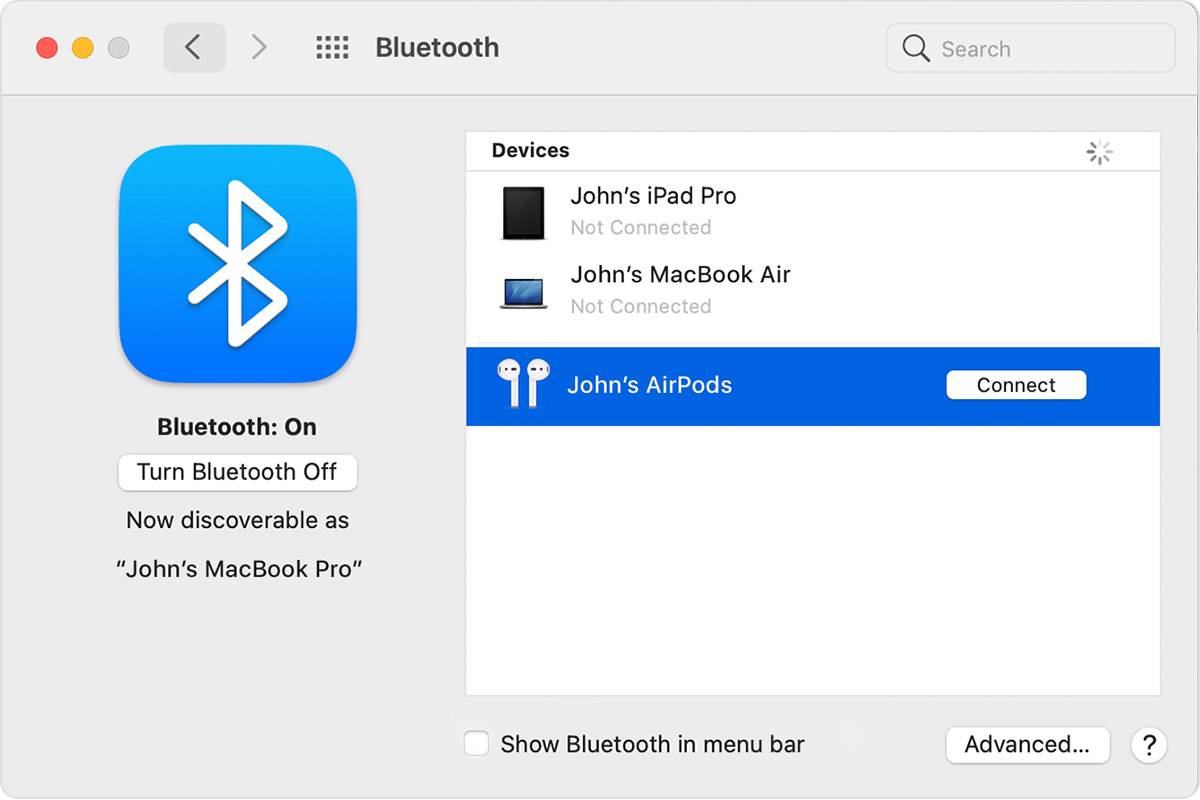
STEP 5: Now go back to the Bluetooth section on your MacBook. You should see your AirPods name appeared in the list of devices that was recognized at that moment. There will be a blue button in the session next to them that says “Connect”. Click on it to connect both your MacBook and AirPods together. Now you should be able to test your AirPods and make sure they work correctly.
Your AirPods can’t connect?
Some people experience problems when they try to connect their AirPods and receive messages like “Could not connect to device.” This usually indicates a connectivity problem or a sign that iCloud has gotten a bit confused.
Here are some solutions that generally fix things like that:
Go back to your Bluetooth session in the upper right corner and select Turn off Bluetooth. Wait a minute, then turn your Bluetooth back on and try again. Sometimes that’s all it takes to connect both.
You can either try doing it this way so as to solve the issue:
Turn off your AirPods and MacBook, then restart, first your Mac, then your AirPods. This can often clear up any connectivity confusion.
Do you have an iPhone / iPad connected to your MacBook account? Head over to the Bluetooth section of Settings on your iOS device and see if your AirPods are connected here. If so, select them and choose forget this device (Airpods name).
Now try connecting them to your Mac and then reconnecting to your iPhone when necessary if this method is successful.
Table of Contents